
LED lights have become a popular choice for both interior and exterior applications due to their energy efficiency, long lifespan, and versatility. However, removing these lights, whether they’re adhered to a vehicle, wall, or any painted surface, can be tricky. Improper removal can lead to damage, such as peeling or chipping the paint. To avoid these issues, it’s essential to follow specific techniques and best practices. Below, we explore eight tips for removing LED lights without affecting the paintwork, ensuring that your surfaces remain pristine and damage-free.
Understanding the Different Types of Adhesives Used
When it comes to removing LED lights without damaging the paint, one of the most critical factors to consider is the type of adhesive used to secure the lights. LED strips and fixtures are often attached using a variety of adhesive backings, each with different levels of bonding strength and composition. The adhesive type plays a significant role in determining the appropriate removal technique, ensuring that the paint remains intact during the process.
Identifying Adhesive Types
The first step in safely removing LED lights is to identify the specific type of adhesive used. This can often be found in the product specifications or the manufacturer’s guidelines. Adhesives can range from simple double-sided tape to more robust, industrial-strength adhesives like acrylic, silicone, rubber, or epoxy-based options. Each of these adhesives has unique characteristics that influence how they should be handled during removal.
For example, LED lights secured with lighter adhesives, such as rubber-based double-sided tape, may be easier to remove. These adhesives typically offer a moderate bond that can often be undone with gentle pulling at a shallow angle, making them less likely to damage the paint. However, even with these lighter adhesives, care must be taken to avoid abrupt or forceful removal, which could still pose a risk to the paintwork.
On the other hand, stronger adhesives, such as acrylic or epoxy-based ones, present a greater challenge. These adhesives are designed for more permanent applications, providing a much stronger bond. As a result, simple pulling is unlikely to suffice and could lead to paint damage if attempted without proper preparation. In these cases, the adhesive may need to be softened before removal, a process that often involves applying heat or using chemical agents designed to break down the adhesive bond.
The Role of Adhesive Strength
Understanding the strength of the adhesive is also crucial in determining whether additional tools or products will be necessary. For lighter adhesives, basic tools like a plastic scraper or a credit card might be sufficient to gently lift the LED lights without scratching the surface. However, for stronger adhesives, more specialized tools and products might be required.
Heat guns or hairdryers can be effective in softening certain adhesives, making it easier to peel away the LED lights without pulling up the paint. Applying heat helps to break down the adhesive’s molecular structure, reducing its bonding strength and allowing for a smoother removal process. This method is particularly useful for acrylic-based adhesives, which respond well to heat.
For adhesives that do not respond adequately to heat, such as some industrial-strength or epoxy-based adhesives, chemical adhesive removers might be necessary. These products are designed to dissolve the adhesive, making it easier to wipe away the residue without affecting the paint underneath. However, when using chemical agents, it’s essential to select products that are safe for painted surfaces to avoid any adverse reactions that could damage the paint.
Tailoring the Removal Technique
Once the adhesive type and strength are identified, the removal technique can be tailored accordingly. For instance, if the LED lights are secured with a silicone-based adhesive, which is flexible and water-resistant, applying a combination of mild heat and an adhesive remover can effectively loosen the bond. This method allows the lights to be gently peeled away, leaving the paint intact.
In contrast, if an epoxy-based adhesive was used, the removal process might require a more intensive approach. Given the hard, permanent bond that epoxy forms, you might need to use a combination of heat, chemical solvents, and mechanical tools to break the adhesive’s hold. This process should be done cautiously to avoid scratching or peeling the paint, and in some cases, it may be advisable to consult a professional to ensure the best results.
Preparing for Adhesive Residue
Even after the LED lights are removed, some adhesive residue may remain on the surface. The type of adhesive will determine the best method for cleaning up this residue. Rubber-based adhesives, for instance, typically leave behind a sticky residue that can be removed with a gentle adhesive remover or even a mixture of warm water and mild detergent.
In the case of stronger adhesives like acrylic or epoxy, the residue may be more challenging to remove. Chemical adhesive removers specifically formulated for these types of adhesives are often required to dissolve the remaining material. Care must be taken during this process to avoid spreading the residue or causing further damage to the paint. After the adhesive residue is removed, it’s a good idea to clean the area with a soft cloth and a gentle cleaning solution to restore the paint’s appearance.
Preparing the Area for Removal
The Importance of Cleaning the Surface
Before you even begin the process of removing LED lights, it is crucial to clean the surrounding area thoroughly. This step is often overlooked but plays a significant role in protecting the paint from damage during removal. Dust, dirt, or grease that has accumulated around the LED lights can create friction or adhesion issues, making it more challenging to remove the lights cleanly. Additionally, these contaminants can get caught between the adhesive and the surface, leading to scratches or chips in the paint as you pull the lights away.
Choosing the Right Cleaning Solution
To clean the surface effectively, use a gentle cleaning solution suitable for the type of paint you are working with. For most surfaces, a mixture of warm water and mild detergent will suffice. However, if the lights are installed in an environment with high exposure to pollutants, such as on a vehicle or an outdoor wall, you may need a more specialized cleaner to remove stubborn grime or grease.
Begin by dampening a soft cloth with your cleaning solution and gently wiping down the area around the LED lights. Make sure to clean not only the immediate area where the lights are attached but also the surrounding surface to ensure there are no loose particles that could interfere with the removal process. Pay close attention to corners and edges where dirt tends to accumulate. After cleaning, allow the area to dry completely before proceeding with the removal. This ensures that the adhesive remains unaffected by moisture, which could complicate the process.
Gathering the Necessary Tools
Once the surface is clean and ready, the next step is to gather the tools you will need to safely remove the LED lights. The tools you choose can significantly impact the success of the removal and the condition of the paintwork afterward. It’s important to have everything you need on hand before starting, as this will allow you to work methodically and reduce the risk of errors.
Selecting Tools for Adhesive Removal
For most LED light removal tasks, you will need a selection of tools that cater to the specific adhesive and surface type. A hairdryer or heat gun is essential if you are dealing with strong adhesives like acrylic or epoxy. These tools are used to apply controlled heat to the adhesive, softening it and making it easier to peel away without pulling up the paint. When using a heat gun, keep it on a low setting and move it slowly across the adhesive to avoid overheating the paint, which could cause discoloration or blistering.
A plastic scraper is another indispensable tool for this task. Plastic is preferred over metal because it is less likely to scratch or chip the paint as you work to lift the LED lights. Choose a scraper with a thin, flexible edge that can slide between the adhesive and the surface without digging into the paint. If you do not have a plastic scraper, a similar tool like a credit card can be used in a pinch, providing a gentle and controlled method for separating the adhesive from the surface.
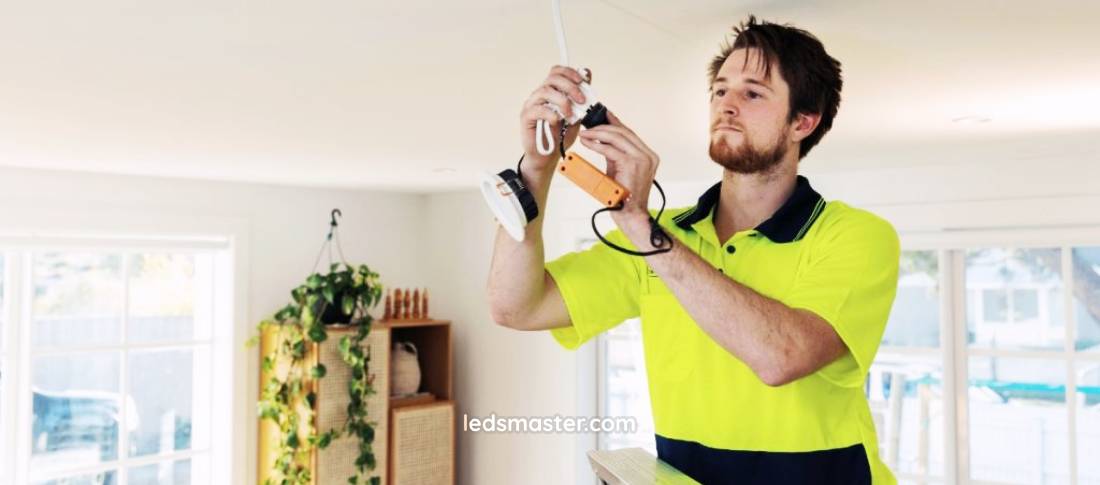
Applying Heat to Soften the Adhesive
The Role of Heat in Adhesive Removal
Heat is a powerful tool in the process of removing LED lights, especially when dealing with adhesives that are particularly strong or stubborn. The adhesive backing on LED lights is designed to hold the lights securely in place, which can make removal challenging without the use of heat. By warming the adhesive, you reduce its tackiness, allowing the LED lights to peel away more easily without pulling up or damaging the paint.
A hairdryer or heat gun is commonly used for this purpose. These tools provide a steady stream of warm air that can be directed at the adhesive. The key here is to soften the adhesive just enough to weaken its bond without overheating it to the point where it starts to degrade or cause the paint to blister.
The application of heat works by temporarily reducing the adhesive’s bonding strength. As the adhesive becomes more pliable, it can be gently pulled away from the surface, minimizing the risk of damaging the paint. This technique is particularly useful for LED lights attached with industrial-strength adhesives, which might otherwise require significant force to remove, increasing the risk of paint damage.
Controlled Heat Application
While heat is effective, it must be applied in a controlled manner to avoid damaging the paintwork. One of the biggest risks when using heat is overheating, which can cause the paint to blister, fade, or even peel away. To prevent this, it’s crucial to keep the heat source moving and avoid concentrating it on one spot for too long.
Start by setting your hairdryer or heat gun to a low heat setting. Hold the device a few inches away from the LED lights and move it steadily back and forth across the adhesive area. This ensures that the heat is distributed evenly, softening the adhesive without causing localized overheating. It’s important to warm the entire length of the LED light strip or fixture, as this will allow you to remove it more evenly and with less effort.
If you’re unsure about the right temperature to use, always err on the side of caution. Begin with the lowest heat setting and gradually increase if necessary. Test the heat on a small, inconspicuous area of the adhesive first to ensure that it is effective without harming the paint. This approach helps you gauge the correct amount of heat needed without taking unnecessary risks.
Monitoring the Heat’s Impact
As you apply heat, keep a close eye on the paintwork and the adhesive’s reaction. The goal is to soften the adhesive just enough to make it pliable, not to melt it completely. If you notice any signs of the paint becoming discolored or starting to blister, immediately reduce the heat or stop altogether to reassess your approach.
Another important aspect of controlled heat application is to monitor the adhesive’s pliability. Once the adhesive feels softer and less tacky to the touch, it’s time to start the removal process. Begin by gently lifting one corner of the LED light strip or fixture and slowly peel it away from the surface. If you encounter resistance, apply a bit more heat to that specific area before continuing.
Ensuring Even Heat Distribution
Ensuring even heat distribution is essential for the successful removal of LED lights. If the heat is not applied uniformly, some areas of the adhesive may remain too strong, making the removal process uneven and increasing the risk of damage. To achieve even distribution, maintain a consistent distance between the heat source and the surface, and move the device in smooth, controlled motions.
For larger LED installations, consider breaking down the removal process into smaller sections. Focus on heating and removing one section at a time, rather than trying to tackle the entire installation at once. This methodical approach allows for better control over the heat application and ensures that each section of the adhesive is properly softened before removal.
Post-Removal Considerations
After successfully removing the LED lights, it’s important to give the paintwork some attention to ensure it remains in good condition. The area where the lights were attached may have some residual adhesive, which can be removed with a gentle adhesive remover or a soft cloth. Be sure to follow up with a clean, damp cloth to remove any traces of the remover and prevent any potential damage to the paint.
Gentle Peeling Techniques
Slow and Steady Wins the Race
One of the fundamental principles of removing LED lights without affecting the paintwork is to peel slowly and steadily. This approach minimizes the risk of pulling the adhesive away with the paint, which can result in unsightly and costly damage. To begin, start at one end of the LED strip or fixture and gently pull it away from the surface at a 45-degree angle. This angle allows for a gradual separation of the adhesive from the painted surface, reducing the likelihood of adhesive residue or paint removal.
Applying too much force or peeling too quickly can cause the adhesive to rip away in chunks, taking some of the paint with it. This is particularly true for strong adhesives or older installations where the bond has set firmly over time. If you find that the LED lights are not coming off easily, stop and reassess your approach. Reapply heat to the area to soften the adhesive further before attempting to peel it away again. This will help to ensure that the adhesive remains pliable and easier to remove without causing damage to the paint.
Patience is essential in this process. Rushing through the removal can result in irreversible damage to the paint, such as scratches or peeling. If you encounter particularly stubborn adhesive, consider using a plastic scraper to assist in the removal. A plastic scraper is less likely to damage the paint compared to metal tools, and it can help gently lift the LED lights from the surface without applying excessive pressure.
Using Dental Floss for Precision
Dental floss is a surprisingly effective tool for removing LED lights, especially when precision is required to avoid damaging the paint. The thin, flexible nature of dental floss allows it to slide behind the LED strip or fixture with minimal force, cutting through the adhesive while minimizing direct contact with the painted surface. This technique is particularly useful in delicate areas or when dealing with very strong adhesives.
To use dental floss, cut a length that is long enough to work with comfortably. Gently slide the floss behind the LED strip or fixture, positioning it near the adhesive line. Using a gentle sawing motion, work the floss through the adhesive, being careful not to apply too much pressure. The floss should cut through the adhesive layer without putting undue stress on the paint. This method is effective in separating the LED lights from the surface without leaving behind significant adhesive residue or causing damage.
If the LED strip is particularly wide or the adhesive is exceptionally strong, you may need to use a combination of dental floss and other tools. For example, start with dental floss to cut through the adhesive, and then use a plastic scraper to gently lift the remaining adhesive. This combined approach can make the removal process more efficient and effective while still protecting the paint.
Combining Techniques for Optimal Results
In some cases, the best results come from combining different gentle peeling techniques. Start by applying heat to soften the adhesive, which will make it easier to peel away. Then use dental floss to cut through the adhesive in delicate areas, and follow up with a plastic scraper if needed to lift any remaining residue. This multi-step approach ensures that you address both the adhesive’s strength and the paint’s vulnerability. Always remember to work slowly and carefully throughout the process. Taking the time to remove the LED lights in a controlled manner helps to preserve the quality of the paintwork and reduces the risk of damage.
Utilizing Adhesive Removers
After removing LED lights, it is common to find adhesive residue left behind on the painted surface. To address this, adhesive removers can be employed effectively to clean up the remnants. However, selecting and applying the right adhesive remover is crucial to avoid damaging the paintwork. This section will guide you through choosing the appropriate adhesive remover, applying it correctly, and using additional tools like plastic scrapers to handle stubborn adhesive residues.
Choosing the Right Adhesive Remover
Selecting the appropriate adhesive remover is essential to ensure that the paint remains undamaged while effectively cleaning up adhesive residue. When choosing an adhesive remover, look for products specifically formulated for use on painted surfaces or automotive finishes. These products are designed to dissolve adhesives without harming the underlying paint.
Avoid using harsh chemicals such as acetone or strong solvents, as these can cause significant damage to the paint, leading to discoloration or even peeling. Such chemicals can break down the paint’s protective layers, resulting in irreversible damage. Always read the product label to ensure it is safe for the type of paint or finish you are dealing with.
Before applying the adhesive remover, it is wise to test it on a small, inconspicuous area of the surface. This test will help confirm that the remover does not react negatively with the paint. Apply a small amount of the adhesive remover to the test area and observe it for any signs of discoloration, peeling, or other adverse reactions. If the test area remains unaffected, you can proceed with confidence to use the remover on the larger area.
Applying and Removing Adhesive Remover
To effectively use an adhesive remover, follow the product instructions carefully. Generally, you will need to apply the remover to a soft cloth or directly onto the adhesive residue. Ensure that the cloth is clean and free from abrasive materials that could scratch the paint. Gently dab or wipe the adhesive remover onto the residue, allowing it to sit for a few minutes to break down the adhesive.
After the adhesive remover has had sufficient time to work, use a clean cloth to gently wipe away the softened adhesive. It is important to use a soft cloth to avoid scratching the paint. Depending on the strength of the adhesive and the amount of residue, you may need to repeat this process several times. Patience is key; rushing through the cleaning can lead to inadequate removal and potential damage.
Once all the adhesive residue has been removed, follow up with a gentle cleaning solution to eliminate any remaining traces of the adhesive remover. This step helps to ensure that no chemical residues are left on the surface, which could potentially affect the paint over time. Rinse the area with clean water and wipe it dry with a soft, clean cloth.
Using a Plastic Scraper for Stubborn Areas
The Benefits of a Plastic Scraper
Advantages Over Metal Scrapers
One of the primary benefits of using a plastic scraper is its ability to protect the integrity of the painted surface. Metal scrapers, although effective for certain tasks, have a higher likelihood of scratching or chipping the paint due to their rigid edges. In contrast, plastic scrapers offer a softer, more flexible edge that conforms to the surface, reducing the risk of surface damage.
Plastic scrapers come in various shapes and sizes, allowing for better control and precision in removing adhesive. For instance, some plastic scrapers are designed with rounded edges that further minimize the chance of causing scratches. These tools are ideal for working in tight or intricate areas where a more delicate approach is required.
Effective Use of a Plastic Scraper
To use a plastic scraper effectively, first ensure that the surface has been properly prepared with heat or adhesive remover. This preparation will soften the adhesive and make it easier to lift away. Hold the scraper at a shallow angle to the surface to ensure that you’re working with the least amount of pressure needed. This angle helps the scraper to slide under the adhesive residue without digging into the paint.
Apply gentle, consistent pressure as you move the scraper across the surface. It’s important to work slowly and methodically, as applying too much force can still lead to surface damage, even with a plastic tool. For large areas where adhesive residue is widespread, a plastic scraper helps to cover more ground efficiently while maintaining the safety of the paintwork.
In addition to its effectiveness, using a plastic scraper can help in achieving a cleaner removal process. Unlike abrasive methods, it reduces the likelihood of leaving behind scratches or marks on the surface, providing a smoother and more even finish.
Scraping Techniques for Delicate Surfaces
On delicate surfaces, such as custom paint jobs, high-gloss finishes, or surfaces with intricate detailing, extra care is required when using a plastic scraper. These surfaces are more susceptible to damage, and the goal is to remove adhesive residue without compromising their appearance.
Gentle Application for Sensitive Surfaces
When scraping delicate surfaces, apply as little pressure as possible. The key is to avoid any aggressive scraping that might cause even minor scratches. Work in small sections and frequently check the area to ensure that the scraper is not causing any damage. If you notice any signs of scratches or the scraper is not moving the adhesive effectively, it’s advisable to stop and reassess your approach.
Taking frequent breaks allows you to monitor the surface closely and adjust your technique if necessary. Sometimes, switching to a different method, such as additional adhesive remover or reapplying heat, can be more effective and safer for sensitive surfaces. This approach helps to ensure that the adhesive is softened and removed thoroughly without the need for excessive scraping.
Alternative Methods for High-Gloss and Custom Paints
For high-gloss finishes and custom paints, consider using alternative methods if scraping proves too risky. Additional adhesive remover or heat application can help to loosen the adhesive more effectively, reducing the need for scraping. In some cases, using a soft cloth with gentle cleaning solutions can be sufficient to remove residue without physical scraping.
Cleaning and Polishing the Paintwork
After successfully removing the LED lights and their adhesive backing, it is essential to address any remaining residue and restore the paintwork to its original condition. Cleaning and polishing are crucial steps in this process, ensuring that the surface looks smooth and rejuvenated. Additionally, taking preventive measures can help avoid similar issues in the future.
Removing Any Remaining Residue
Once the LED lights and adhesive have been completely removed, it’s important to clean the area thoroughly to ensure that no residue remains. Residual adhesive can attract dirt and grime, which may impact the overall appearance of the paintwork. To address this, use a gentle automotive cleaner or surface cleaner specifically formulated for painted surfaces. Apply the cleaner using a soft cloth or sponge to avoid scratching the paint.
Work in small sections to ensure that you cover the entire area where the LED lights were installed. Apply the cleaner in a circular motion, which helps to lift and dissolve any remaining adhesive without spreading it to other areas. After applying the cleaner, rinse the area with clean water and dry it with a soft, microfiber cloth. This step ensures that all cleaning agents are removed and the surface is ready for polishing.
Polishing for a Smooth Finish
Polishing the paintwork after removing LED lights is an effective way to restore the surface to its original gloss and smoothness. Choose a high-quality polish that is suitable for your specific type of paint—whether it’s standard automotive paint, clear coat, or high-gloss finish. The right polish will help to remove minor imperfections and enhance the paint’s shine.
Apply the polish using a soft, microfiber cloth, and work it into the surface using circular motions. This method ensures an even application and helps to blend any areas that may have been affected by the adhesive removal process. Polishing not only improves the appearance of the paint but also provides a protective layer that can help prevent future damage.
If you notice any fine scratches left from the removal process, polishing can often diminish their appearance. For deeper scratches or significant damage, you may need to use a rubbing compound or seek professional assistance. Rubbing compounds are more abrasive and can help to level out deeper scratches before finishing with a polish.
Preventing Future Damage
Using Removable Adhesive Strips or Pads
For installations that need to be removed or replaced in the future, removable adhesive strips or pads are an excellent choice. These products are specifically designed to adhere securely while being gentle on painted surfaces. They are less aggressive compared to permanent adhesives, which helps in preventing damage to the paint when it’s time to take down the LED lights.
Removable adhesive strips are often designed with a special backing that allows them to be peeled away cleanly without leaving residue or damaging the surface. Similarly, adhesive pads designed for easy removal are generally formulated to provide a strong hold while remaining gentle on paintwork. These options are particularly useful in environments where LED lights may need to be frequently updated or repositioned.
Avoiding Industrial-Strength Adhesives
Industrial-strength adhesives, while effective for certain applications, are generally not recommended for use on painted surfaces unless absolutely necessary. These adhesives are formulated for heavy-duty applications and can be very difficult to remove, often causing damage to the paintwork in the process. Their strong bonding properties mean that they can pull away not only the adhesive but potentially also the paint when removed.
If you do find it necessary to use a stronger adhesive due to specific requirements, apply it sparingly and consider the impact on the paintwork. Ensure that you follow the best practices for removal to minimize any potential damage. Using a combination of heat and adhesive removers, as outlined in this guide, can help mitigate the risks associated with stronger adhesives.
Regular Maintenance and Inspection
To maintain both the integrity of your LED lights and the condition of your painted surfaces, regular maintenance and inspection are key. Routine checks can help identify issues before they escalate, ensuring that any potential damage is addressed promptly.
Inspecting LED Lights and Adhesive
Regularly inspect the LED lights and their adhesive backing to ensure that they are securely attached and not causing damage to the paintwork. Look for any signs of peeling or weakening of the adhesive, which can indicate that the adhesive is starting to fail. Addressing these issues early can prevent further damage and make future removal easier.
Taking Action on Early Signs of Damage
If you notice any early signs of damage, such as adhesive residue affecting the paint or small areas where the paint may be lifting, take immediate action. Gently clean the affected area and reapply the adhesive if necessary. In cases where the damage is more significant, you may need to consult a professional to assess and address the issue effectively.
Conclusion
Removing LED lights from painted surfaces requires careful attention to the type and strength of the adhesive used. By identifying the adhesive type, using appropriate tools, and applying techniques such as gentle heat and dental floss, you can effectively remove the lights while preserving the paintwork. Always clean the surface before starting, and use specific adhesive removers for any remaining residue to ensure a pristine finish. Patience and precision in the removal process will help maintain the integrity of the painted surface, avoiding damage and ensuring a smooth and successful cleanup.