
Removing the cover from a light switch is a common task that many people undertake for various reasons, including maintenance, replacement, or aesthetic changes. While this might seem straightforward, it’s essential to approach this task with a clear understanding of the process and the potential risks involved. This article will guide you through the steps to safely remove a light switch cover, considerations to keep in mind, and potential issues that may arise.
Understanding the Purpose of the Light Switch Cover
Protection and Safety
The light switch cover serves a fundamental role in safeguarding both the electrical components of the switch and the safety of individuals interacting with it. By acting as a protective barrier, the cover shields the internal mechanisms of the switch from various environmental factors that could potentially compromise its performance. This is crucial in maintaining not only the operational integrity of the switch but also ensuring the safety of users who come into contact with it. The cover helps in preventing exposure to elements that might cause deterioration or malfunction, thereby prolonging the switch’s lifespan and minimizing the risk of accidents.
Shielding Against Dust and Debris
Electrical switches are particularly vulnerable to the accumulation of dust and debris. When dust settles inside a switch, it can interfere with the switch’s mechanical parts and electrical connections. Over time, this accumulation can lead to increased wear and tear, malfunctioning, or even electrical shorts. The light switch cover plays a vital role in preventing these issues by acting as a barrier that keeps dust and dirt away from the switch’s internal components. This protection helps in ensuring that the switch operates smoothly and reliably, reducing the likelihood of frequent repairs or replacements. By keeping the switch clean and free from debris, the cover contributes to the longevity and consistent performance of the switch.
Preventing Moisture Damage
Moisture is another significant threat to electrical systems. In areas prone to high humidity or water exposure, such as bathrooms or kitchens, moisture can seep into the switch and cause corrosion or short-circuiting. The light switch cover is designed to protect the switch from such moisture, thereby acting as a crucial line of defense. It prevents water and humidity from coming into direct contact with the internal components of the switch. By minimizing moisture-related risks, the cover helps to prevent potential electrical faults and extend the overall life of the switch, ensuring that it continues to function properly even in challenging environments.
Avoiding Accidental Contact
Safety is a primary concern when dealing with electrical components, and the risk of accidental contact with live parts is significant. The light switch cover is instrumental in preventing such accidents by providing a physical barrier between users and the exposed parts of the switch. This is particularly important in households with children or pets, where accidental touches could lead to electric shocks or other safety hazards. By enclosing the switch, the cover ensures that any live electrical components are securely contained, significantly reducing the risk of electric shock and enhancing overall household safety.
Enhancing Electrical System Integrity
The light switch cover also contributes to the broader integrity of the electrical system. By preventing environmental and physical factors from affecting the switch, the cover helps maintain consistent performance and reliability. This protective aspect is vital in avoiding costly repairs or replacements that could arise from preventable damage. The cover’s role in safeguarding the switch from external influences ensures that the electrical system remains robust and functional, thereby supporting the efficient operation of the entire system.
Aesthetic Appeal
While the functional benefits of a light switch cover are paramount, its contribution to the room’s aesthetics is also significant. The cover provides a polished and cohesive look to the wall, enhancing the overall appearance of the room.
Design and Style Options
Light switch covers come in a diverse array of designs, materials, and finishes, offering homeowners numerous options to match their interior decor. For example, plastic covers can be customized with paint or texture to blend seamlessly with the wall color or design theme. Metal covers, such as those made from brass, chrome, or other materials, can add a touch of elegance and sophistication to the room. Additionally, decorative switch covers featuring artistic patterns, intricate designs, or custom elements can serve as focal points, adding a unique and stylish touch to the space. These design options allow homeowners to select covers that not only protect the switch but also enhance the room’s visual appeal.
Matching Interior Design
The light switch cover can be an integral component of the room’s design scheme. Homeowners can choose covers that either match or contrast with other design elements, such as wall colors, fixtures, or furniture. This level of flexibility allows for a cohesive and well-thought-out look throughout the space. By aligning the switch cover with the room’s overall design, homeowners can create a harmonious environment that reflects their personal style and preferences.
Concealing Imperfections
In addition to its aesthetic role, the light switch cover can help conceal minor imperfections on the wall around the switch. For instance, if there are scratches, holes, or blemishes from previous paint jobs, the cover can provide a neat and uniform appearance that masks these issues. This not only enhances the overall finish of the wall but also provides a cleaner, more polished look. The cover thus serves a dual purpose by addressing both functional and cosmetic concerns.
Customization and Personalization
For those seeking a unique touch in their decor, custom or personalized switch covers offer a perfect solution. These covers can be designed to feature specific colors, patterns, or themes that align with the homeowner’s tastes and preferences. Custom switch covers can transform a standard fixture into a distinctive element of the room’s decor, making it stand out as a personalized and integral part of the space. This level of customization adds a personal touch, allowing homeowners to express their individuality and enhance the overall aesthetic of their interior design.
Tools Required for Removing a Light Switch Cover
Screwdrivers
When it comes to removing a light switch cover, the screwdriver is the primary tool you’ll need. Light switch covers are generally secured to the wall with screws, and the type of screwdriver required depends on the type of screws used. Using the correct screwdriver not only makes the task easier but also helps prevent damage to the screw heads or the wall.
Flathead Screwdriver
The flathead screwdriver, characterized by its single, flat blade, is designed for screws with a horizontal slot. Although it is less commonly used for light switch covers, you might encounter it in older installations or less conventional designs. This type of screwdriver can be useful for switches where the screw head is not Phillips or where the design necessitates a flat blade. It’s important to use a flathead screwdriver that matches the size of the screw slot to avoid slipping and damaging the screw or the surrounding area.
Phillips Head Screwdriver
The Phillips head screwdriver features a cross-shaped blade that fits into the cross-shaped slot of Phillips head screws. This type of screwdriver is the most commonly used for light switch covers due to its superior grip and the ability to apply more torque, which is essential for loosening or tightening screws securely. The design of the Phillips head screwdriver allows it to engage more effectively with the screw, reducing the risk of slipping and stripping the screw head. It is advisable to use a Phillips head screwdriver that matches the size of the screw to ensure a secure fit and prevent damage.
Importance of the Right Screwdriver
Using the correct screwdriver for the type of screw is crucial for a smooth removal process. If you use the wrong type of screwdriver, you risk damaging the screw head, which can make it difficult to remove or replace the cover. A misfit screwdriver can strip the screw head, leading to frustration and potentially causing damage to the wall or switch. Properly fitting the screwdriver into the screw slot ensures that the removal process is efficient and that the screw and surrounding area remain intact. This attention to detail helps avoid unnecessary damage and makes the task easier to complete.
Additional Screwdriver Tips
For best results, it’s important to ensure that the screwdriver is the correct size for the screws being removed. A screwdriver that is too small may slip out of the screw slot, while one that is too large can cause damage to the screw or wall. Additionally, a screwdriver with a comfortable handle is recommended, especially if significant force is needed. A well-designed handle can improve grip and control, reducing hand fatigue and making the task more manageable. Investing in a quality screwdriver set with various sizes and types can make light switch cover removal and other tasks much easier and more efficient.
Electrical Tape
Electrical tape is a simple yet essential tool when working with light switches. It serves as a safety precaution to prevent accidental contact with electrical terminals and provides added security during the removal process.
Purpose and Application
Before you begin removing the light switch cover, applying electrical tape to the switch is a prudent precaution. This tape helps to prevent any unintended contact with live electrical components, which is particularly important if the power is accidentally turned back on or if you need to handle the switch and its wiring while the cover is off. Electrical tape provides a protective layer that helps ensure that your hands or tools do not come into contact with exposed electrical parts, reducing the risk of electric shock and enhancing overall safety.
Safety Benefits
The primary safety benefit of electrical tape is its ability to provide an extra layer of insulation. This helps to minimize the risk of electric shock by preventing accidental contact with live wires or terminals. Additionally, electrical tape can be used to secure any loose wires that may be exposed during the removal process. By covering these potentially hazardous areas, the tape helps to prevent accidental contact or damage, ensuring that the work is completed safely and efficiently.
Proper Use
When applying electrical tape, it’s important to ensure that all exposed parts of the switch and terminals are covered adequately. Avoid overwrapping, as too much tape can make it difficult to work with and may interfere with the proper handling of the switch. Ensure that the tape is applied neatly and securely to cover all potentially dangerous areas. Once the task is complete, carefully remove the tape to avoid any damage to the switch or surrounding area. Proper application and removal of electrical tape are crucial for maintaining safety and ensuring that the switch remains in good condition.
Voltage Tester
A voltage tester is an important tool for ensuring safety when working with electrical components. It is used to check whether the light switch is live or if there is any electrical current running through it. This tool helps to verify that the switch is safe to work on before you begin any handling or adjustments.
Purpose and Function
The primary purpose of a voltage tester is to confirm that the electrical power is turned off before you start working on the switch. This is a critical step in ensuring safety, as working on a live switch can result in electric shock or other hazards. By using a voltage tester, you can check for the presence of electrical current and ensure that there is no power flowing through the switch. This helps to reduce the risk of electric shock and ensures that you can work on the switch with confidence.
Non-Contact Voltage Tester
This type of tester allows you to check for the presence of voltage without making direct contact with the electrical wires. You simply hold the tester near the switch or wires, and it will indicate whether voltage is present through visual or audible signals. Non-contact testers are convenient and safe to use, as they eliminate the need for direct contact with live wires.
Contact Voltage Tester
This tester requires direct contact with the electrical terminals or wires. It usually has two probes: one for grounding and one for testing. When the probes touch the live wires, the tester will light up or beep, indicating the presence of voltage. Contact testers are useful for more precise testing but require careful handling to ensure safety.
Usage Tips
Before using the voltage tester on the light switch, ensure that it is functioning correctly by testing it on a known live circuit. Follow the manufacturer’s instructions for proper use and handle the tester with care. If you are unsure whether the power is completely off, it is advisable to use the tester again as a precaution. Proper use of the voltage tester helps to ensure that you are working safely and reduces the risk of accidents or electrical hazards.
Importance of Testing
Even if you believe the power is off, it is always a good practice to double-check with a voltage tester. Electrical systems can sometimes be unpredictable, and it is crucial to ensure that no current is present before working on the switch. This extra step helps to maintain safety and prevent any potential electrical issues, ensuring that the work is completed without incident. By making testing a routine part of your process, you can work with greater confidence and minimize the risk of electrical hazards.
Step-by-Step Guide to Removing a Light Switch Cover
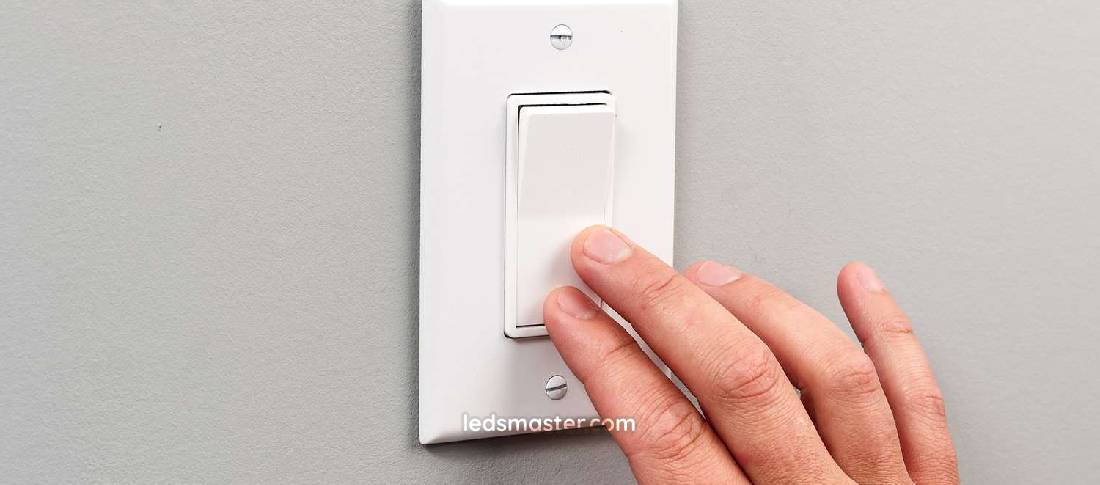
Turn Off the Power
The very first step in removing a light switch cover is to turn off the power to the switch at the circuit breaker. This precautionary measure is crucial to avoid any risk of electric shock while working on the switch. Locate the circuit breaker panel in your home, which is often found in a basement, utility room, or hallway. Identify the circuit breaker that controls the light switch you are working on, typically labeled for easy identification. Flip the breaker to the “off” position to cut off the electrical supply. To further ensure your safety, it is advisable to use a voltage tester to confirm that there is no electrical current running through the switch. This device allows you to check the switch or wires without making direct contact, ensuring that the power is indeed off before you proceed.
Remove the Screws
Once you have confirmed that the power is off, the next step is to remove the screws holding the cover plate in place. Light switch covers are usually secured with one or two screws, which are typically located on the sides of the cover plate. Using the appropriate screwdriver, either a flathead or Phillips head, depending on the type of screws, carefully turn the screws counterclockwise to loosen and remove them. Place the screws in a safe location where they won’t get lost, such as a small container or a designated spot on your work surface. Be gentle while removing the screws to avoid stripping them or damaging the wall around the switch. Once the screws are removed, the cover plate should be loose and ready to come off.
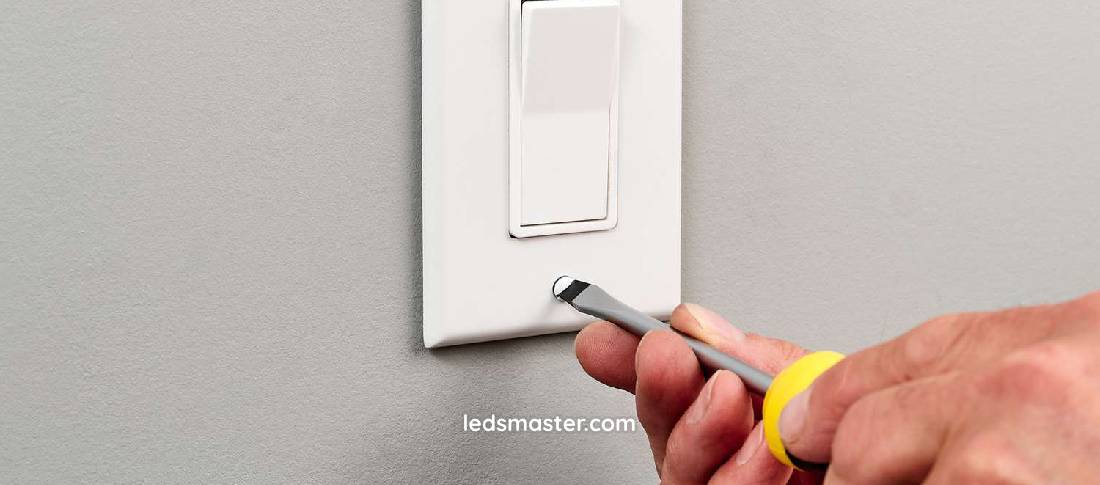
Remove the Cover Plate
With the screws removed, gently pull the cover plate away from the wall. It is important to do this carefully to avoid applying excessive force, which could damage the wall or the switch itself. If the cover plate feels stuck, it might be due to residual paint or caulk that has adhered it to the wall. In such cases, gently use a flathead screwdriver to pry it away, taking care not to scratch or damage the wall surface. Ensure that there are no remaining screws or other obstructions that could be preventing the cover plate from coming off. Once freed, carefully set the cover plate aside, keeping it in a safe place for reinstallation.
Inspect the Switch
With the cover removed, you can now inspect the switch and the wiring behind it. This is the time to perform any necessary maintenance or repairs. Take note of the wiring configuration before making any changes, especially if you need to replace the switch. Disconnect the wires carefully, ensuring you understand their arrangement and connection points. It might be helpful to take a photo or make a diagram for reference. If you are performing any repairs, such as tightening loose connections or replacing damaged components, follow proper safety protocols and electrical guidelines to ensure that the work is done safely and effectively. If the switch appears damaged or faulty, consider consulting a professional electrician for assistance.
Reattach the Cover Plate
After completing any necessary work on the switch, it’s time to reattach the cover plate. Align the cover plate with the switch and ensure that it fits properly over the switch box. Secure the cover plate by replacing the screws and tightening them carefully. It is important to ensure that the screws are tightened adequately to hold the cover plate in place, but avoid over-tightening, which could crack the cover plate or damage the wall. The cover plate should be flush against the wall, providing a neat and secure finish. Double-check that the cover plate is properly aligned and that there are no gaps or misalignments.
Restore Power and Test the Switch
With the cover plate securely reattached, it’s time to restore power to the switch. Go back to the circuit breaker panel and flip the breaker to the “on” position to reactivate the electrical supply. Once the power is restored, test the switch to ensure it is functioning correctly. Flip the switch on and off to verify that it controls the connected light or device as expected. If the switch operates normally and there are no issues, the removal and reinstallation process is complete. If you encounter any problems or the switch does not function as intended, double-check your work or consult a professional electrician to address any potential issues.
Common Issues and Troubleshooting
Difficulty Removing the Cover Plate
Encountering difficulty while removing the cover plate of a light switch is not uncommon, and it often stems from factors like paint or caulking that have sealed the edges of the cover plate. Over time, paint or caulk can form a bond between the cover plate and the wall, making it challenging to remove the plate without causing damage. To address this issue, start by examining the perimeter of the cover plate for any signs of paint or caulk adhesion. Using a utility knife, gently cut through the painted or caulked edges. Be cautious during this process to avoid gouging the wall or damaging the switch itself. Lightly prying the cover plate away from the wall with a flathead screwdriver can also help, but do so gently to minimize any potential damage to the surrounding area. If the cover plate remains stuck, consider using a putty knife to carefully work around the edges and loosen it further.
Stripped or Rusty Screws
Stripped or rusty screws are another common issue that can complicate the removal process. Stripped screws, where the head has become worn and no longer grips the screwdriver properly, can be particularly frustrating. Rusty screws can become corroded, making them difficult to turn. For stripped screws, a screw extractor may be necessary. This tool is designed to grip and remove screws that are difficult to turn due to damage. Apply a screw extractor according to the manufacturer’s instructions, and carefully remove the damaged screw. For rusty screws, applying penetrating oil can help loosen the rust and make it easier to remove the screw. Allow the oil to sit for several minutes to penetrate the rust before attempting to turn the screw again. If the screws are beyond repair, replace them with new ones. Ensure that the replacement screws are of the correct type and size to fit the cover plate securely.
Exposed Wires
Finding exposed wires after removing the cover plate requires careful handling to ensure safety. Exposed wires can pose significant risks, including electrical shock and short circuits. First, ensure that the power to the switch is turned off at the circuit breaker before handling any wires. Inspect the wires for any signs of damage, such as frayed insulation or loose connections. If any wires appear damaged, it is crucial to address these issues promptly to avoid further complications. Use electrical tape to secure any loose or exposed wires temporarily until you can properly repair or replace them. If you are unsure about the condition of the wiring or if you encounter issues beyond basic maintenance, it is advisable to consult a professional electrician. An electrician can assess the wiring’s safety, make necessary repairs, and ensure that the installation complies with electrical codes and safety standards.
Safety Considerations
Electrical Safety
Electrical systems are inherently dangerous if not handled properly, as they involve the flow of electric current, which can cause severe shocks, burns, or even fatal injuries. To ensure a safe working environment and a smooth process, it is essential to follow a comprehensive set of safety guidelines.
Turn Off the Power
The first and most critical step in any electrical work is to turn off the power supply. This should be done at the circuit breaker panel, where you need to locate the correct breaker for the circuit you are working on. Simply turning off the switch at the wall is not sufficient because the circuit could still be live. Once you have turned off the power, use a voltage tester to verify that the switch is indeed de-energized. Voltage testers come in various types, including non-contact testers that alert you to live wires without direct contact. Confirming that there is no electrical current running through the switch minimizes the risk of electric shock and provides peace of mind.
Use Insulated Tools
Using insulated tools is another essential safety measure. Insulated tools, such as screwdrivers, pliers, and wire cutters, are designed with handles that have protective coatings to prevent electrical current from reaching you if you accidentally come into contact with live components. Before using any tool, inspect it for damage, such as cracks or frayed insulation, which can compromise its protective function. Proper insulation ensures that the tools act as a barrier between you and the electrical system, reducing the risk of electric shock.
Avoid Touching Exposed Wires
When working on a light switch, be cautious not to touch any exposed wires or terminals. Even if you have turned off the power, residual current or accidental reactivation of the circuit can still pose a danger. Use appropriate tools to handle wires and avoid direct contact with them. If you need to work with the wires, use insulated pliers or hold them with care to prevent accidental contact. Additionally, keep the work area clear of any conductive materials and ensure that no moisture is present, as water can increase the risk of electrical hazards.
Work in a Dry Environment
Ensure that the area around the switch is dry before starting work. Water and electricity create a dangerous combination that can lead to electrical shock or short circuits. If the switch or surrounding area is wet, wait until it is completely dry before proceeding. Using a dry cloth to wipe off any moisture and ensuring that the work area is free from spills or dampness can help maintain safety during the procedure.
Professional Help
If you are uncomfortable with handling electrical work or if you are unfamiliar with electrical systems, seeking the assistance of a qualified electrician is highly recommended. Professionals are trained to deal with electrical components safely and effectively.
When to Seek Professional Help
It’s prudent to call an electrician if you encounter any issues or if the task at hand exceeds your expertise. For instance, if you notice damaged wiring, frequent tripping of circuit breakers, or if the switch exhibits unusual behavior, a professional should handle these concerns. Even if you feel confident about the task, having a professional review or perform the work ensures that everything is up to code and functioning safely.
Benefits of Hiring a Qualified Electrician
A licensed electrician brings a wealth of experience and knowledge to the job, which helps in diagnosing and solving electrical issues correctly. They adhere to safety standards and local electrical codes, ensuring that all work is performed in compliance with regulations. Additionally, electricians can provide valuable advice on maintaining your electrical system and preventing future problems. This not only enhances the safety of your home but also ensures that your electrical installations are reliable and efficient.
How to Find a Reputable Electrician
When choosing an electrician, ensure that they are properly licensed and insured. Verify their credentials and seek out recommendations from friends, family, or online reviews. A reputable electrician will have a proven track record of quality work and customer satisfaction. Before hiring, discuss the scope of work, costs, and timelines to ensure that you are comfortable with the terms and that the electrician fully understands your needs. This preparation helps in securing professional assistance that meets your requirements and ensures a safe and effective solution to your electrical issues.
Conclusion
Ensuring the power is turned off, using the correct tools, and handling all components carefully are essential for a safe and successful process. By following the outlined procedures and addressing common issues proactively, you can effectively manage any maintenance or updates needed for your light switch while maintaining a safe environment. Whether for practical repairs or aesthetic improvements, attention to detail and adherence to safety practices will ensure a smooth and trouble-free experience.