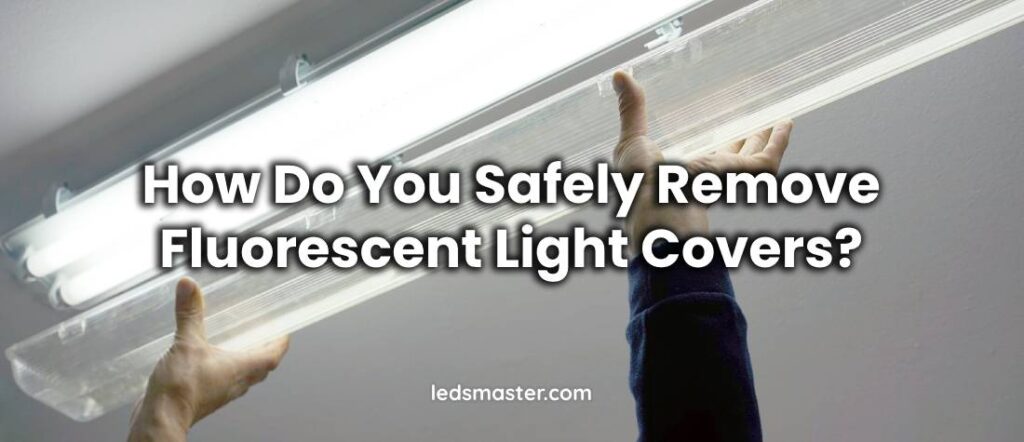
Fluorescent lighting remains a popular choice in both commercial and residential settings due to its efficiency and brightness. However, there are times when maintenance or upgrades require the removal of fluorescent light covers. This task, while seemingly straightforward, necessitates careful handling to ensure safety and prevent damage. This article provides a comprehensive guide on how to safely remove fluorescent light covers, covering the necessary precautions, tools, and techniques.
Understanding Fluorescent Light Covers
Fluorescent light covers, also known as diffusers or lens covers, are essential for ensuring even light distribution and reducing glare from fluorescent tubes. This diffusion creates a more comfortable and uniform illumination, which is beneficial in both commercial and residential environments. By mitigating harsh glare, these covers help prevent eye strain and enhance overall visual comfort.
Made from materials like acrylic or polycarbonate, these covers are designed for durability and functionality. Acrylic provides clarity and resistance to shattering, while polycarbonate offers superior impact resistance. Besides their primary role in diffusing light, these covers protect the fluorescent tubes from dust, dirt, and moisture, thus prolonging the lifespan of the lighting system. However, despite their sturdy design, they can crack or shatter if mishandled during removal, potentially causing injury or damage. Proper care and handling are crucial to avoid accidents and maintain the integrity of both the cover and the lighting fixture.

Preparing for the Removal
Safety First
When preparing to remove fluorescent light covers, ensuring safety is paramount. These covers are typically installed in high locations, which necessitates the use of ladders or other lifting equipment. To minimize the risk of falls or accidents, make sure the ladder is positioned on a stable, level surface. The ladder should be of appropriate height to reach the fixture comfortably without overextending. Additionally, it’s important to inspect the ladder for any signs of damage or instability before use.
Personal protective equipment (PPE) plays a critical role in safeguarding against potential hazards. Wear safety glasses to protect your eyes from falling debris or accidental contact with sharp edges of the cover. Gloves are also essential to provide a firm grip and protect your hands from cuts or scrapes that might occur while handling the cover. Given the potential for broken pieces or sharp fragments, PPE helps mitigate injury risks and ensures a safer work environment.
Power Down
Turning off the power supply to the lighting fixture is a crucial step in preventing electrical hazards. Begin by switching off the circuit breaker that controls the fluorescent lights. This action isolates the electrical circuit and minimizes the risk of electric shock. To further ensure safety, use a non-contact voltage tester to confirm that the power is indeed off. This device can detect the presence of electrical current without physical contact, providing an additional layer of security.
It’s important to approach this step with the assumption that the wires could still be live, even after turning off the breaker. This precaution helps maintain a safety-first mindset and avoids complacency. By thoroughly verifying that the power is off and employing appropriate PPE, you can significantly reduce the risks associated with the removal of fluorescent light covers, ensuring a safer and more efficient process.
Removing the Fluorescent Light Cover
Inspect the Fixture
Before attempting to remove a fluorescent light cover, it is essential to carefully inspect the fixture to understand how the cover is secured. Fluorescent light covers can be attached using various methods, including clips, screws, or other fasteners. Each attachment mechanism requires a different approach for removal. Look for the type and placement of these fasteners to determine the most effective method for disengaging them. Understanding the fixture’s design will help avoid unnecessary damage to both the cover and the fixture.
Removing Clips or Fasteners
The method for removing the cover largely depends on whether it is held in place by clips or screws. If the cover is secured with clips, use a flathead screwdriver to gently press or pry them open. Apply only light pressure to avoid cracking or shattering the cover, as excessive force can easily damage the acrylic or polycarbonate material. If the cover is attached with screws, select the appropriate screwdriver, typically a Phillips or flathead, based on the screw type. Loosen the screws carefully and keep them in a secure location to prevent loss, as they are essential for reinstallation.
Handling the Cover
Once the fasteners are removed, proceed to lower the cover with care. Support the cover with both hands to ensure it does not slip or fall, as dropping it could lead to breakage or injury. If the cover is particularly large or heavy, enlisting the help of a second person can provide additional stability and ease the removal process. Handle the cover gently to avoid placing undue stress on its edges or corners. When setting the cover aside, choose a soft, flat surface to prevent scratches or damage. By handling the cover with caution and precision, you can ensure a smooth removal process and preserve the condition of both the cover and the lighting fixture.
Cleaning and Maintenance
Inspecting the Cover
Once the fluorescent light cover has been removed, it is essential to conduct a thorough inspection for any signs of damage or wear. Examine the cover closely for cracks, chips, or other imperfections that could compromise its functionality or safety. Any damage, such as cracks or significant scratches, can affect the cover’s ability to diffuse light evenly and protect the fluorescent tubes. A damaged cover should be replaced promptly to maintain optimal lighting performance and ensure safety. Additionally, while inspecting the cover, take the opportunity to examine the lighting fixture itself. Look for any wear and tear, such as loose components, corrosion, or accumulated dust and debris. Addressing any issues with the fixture before reinstalling the cover can help prevent future problems and ensure the system operates efficiently.
Cleaning the Cover
Cleaning the fluorescent light cover is an important step in maintaining both its appearance and functionality. Begin by using a soft cloth or microfiber towel to gently wipe the surface of the cover. These materials are ideal as they are non-abrasive and will not scratch or damage the cover. Avoid using harsh or abrasive cleaners, which can damage the cover’s finish and affect its light diffusion properties. For more stubborn stains or accumulated grime, prepare a mild soap solution—such as a mix of gentle dish soap and water—and apply it with a soft cloth. After cleaning, ensure that the cover is thoroughly dried before reinstalling it. Any remaining moisture could lead to streaks or spots on the cover, potentially affecting the quality of the light it diffuses. Proper cleaning not only improves the cover’s appearance but also helps maintain its performance and prolong its lifespan.
Reinstalling the Fluorescent Light Cover
Positioning the Cover
After thoroughly cleaning the fluorescent light cover and inspecting it for any damage, the next step is to reinstall it properly. Begin by aligning the cover with the fixture, ensuring that it fits correctly into its designated place. If the cover was previously secured with clips, gently position it so that the clips can be engaged. Snap or press the clips back into place carefully, making sure that they are securely fastened but without applying excessive force that could damage the cover or the fixture.
For covers that were attached with screws, carefully position the cover so that it aligns with the mounting holes. Insert the screws into their respective holes, and use the appropriate screwdriver to tighten them. It is important to tighten the screws securely to prevent the cover from coming loose, but avoid over-tightening, which can crack or deform the cover or damage the fixture. Ensuring a proper fit and secure attachment will help maintain the integrity of both the cover and the lighting system.
Testing the Fixture
Once the cover is securely reinstalled, turn the power back on to the lighting fixture by switching the circuit breaker back to the ‘on’ position. It is essential to test the fixture to confirm that it is functioning correctly. Observe the light output for any signs of flickering, dim spots, or irregular lighting, which could indicate underlying issues with the fluorescent tubes or the fixture itself.
If you notice any irregularities in the lighting, it may be necessary to inspect the fluorescent tubes or check the electrical connections within the fixture. Flickering or inconsistent lighting can sometimes signal that the tubes need replacing or that there are loose connections or other issues affecting the fixture’s performance. Addressing these issues promptly ensures that the lighting system operates efficiently and provides the desired level of illumination. Proper reinstallation and testing help maintain the effectiveness of the fluorescent lighting and contribute to a safer and more reliable lighting environment.
Addressing Common Issues
Difficulties in Removal
Encountering challenges during the removal of a fluorescent light cover is not uncommon, and addressing these issues requires careful consideration and appropriate tools. If clips are stuck or resistant to movement, one approach is to apply a small amount of lubricant, such as a silicone spray or penetrating oil, to help ease their release. The lubricant can reduce friction and make it easier to pry or press the clips open without applying excessive force.
For screws that are stripped or difficult to remove, a screw extractor can be a valuable tool. A screw extractor is designed to grip and remove damaged or stuck screws. If you do not have access to a screw extractor, consider using a pair of pliers to turn the screw if it protrudes enough to grip. In cases where these methods are ineffective, it may be prudent to seek assistance from a professional who can provide the necessary expertise and tools to resolve the issue without causing damage to the fixture or surrounding area.
Broken Covers
If a fluorescent light cover breaks during removal, it is essential to handle the situation with care to avoid injury or further damage. Begin by carefully cleaning up any broken pieces. Use a broom and dustpan or a vacuum cleaner with a hose attachment to ensure all shards are collected, as small pieces can pose a risk of cuts or injuries. Dispose of the broken cover and any debris in accordance with local regulations, particularly if the cover is made from materials that require special disposal.
Once the area is cleaned, you will need to replace the broken cover with a new one. Ensure that the replacement cover matches the specifications of the original, including size, material, and attachment method. A cover that matches the original specifications will maintain the lighting fixture’s performance and aesthetic integrity. Proper installation of the new cover will help ensure that the fixture continues to function effectively and safely.
Conclusion
The removal and maintenance of fluorescent light covers, while straightforward, requires a careful approach to ensure safety and preserve the integrity of the lighting system. By understanding the function and material of the covers, preparing properly with the right equipment and precautions, and addressing common issues that may arise during the process, one can effectively manage this task. Proper handling, cleaning, and reinstallation of fluorescent light covers not only maintains the aesthetic and functional qualities of the lighting but also contributes to a safer and more efficient lighting environment. Through these practices, the longevity and performance of both the covers and the lighting fixtures can be optimally ensured.