
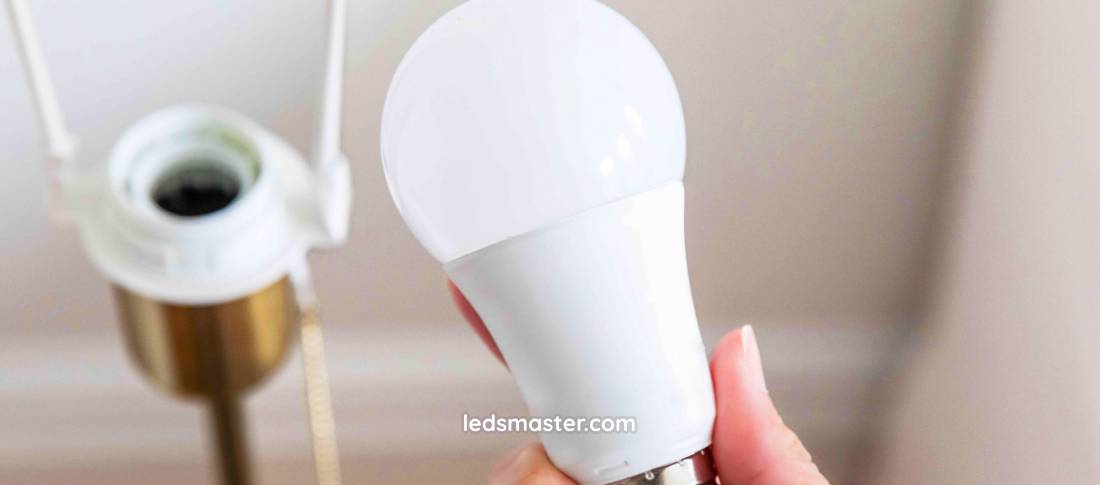
Known for their energy efficiency and longevity, LEDs have become a popular choice in homes, offices, and various other settings. However, there are times when the brightness of these lights needs to be adjusted to better suit the environment or personal preference. Whether you’re seeking a softer ambiance, reducing glare, or accommodating different activities, there are several effective methods to make LED lights less bright.
Utilize Dimmable LED Lights
Understanding Dimmable Options
Dimmable LED lights offer a versatile and convenient way to manage the brightness in your space. Unlike standard LED bulbs, which operate at a fixed brightness level, dimmable LEDs are engineered to provide adjustable illumination. This flexibility allows you to customize the lighting to match various activities, moods, or times of day.
The primary advantage of dimmable LEDs is their ability to reduce light intensity without compromising the quality of light. These bulbs are designed with advanced electronic controls that modulate the amount of power delivered to the LED chips, enabling a smooth transition between different brightness levels. This capability is particularly beneficial for creating ambiance in living rooms, setting a focused work environment in offices, or adjusting lighting levels in dining areas.
Dimmable LEDs can range from simple on-off dimming options to more sophisticated systems that allow for precise control over light levels. Some models even offer features like color temperature adjustment, further enhancing their versatility. When selecting dimmable LED bulbs, consider the range of brightness levels they offer and whether they can provide the specific lighting effect you desire.
Selecting the Right Dimmer Switch
Not all dimmer switches are designed to work with LED technology, and using an incompatible switch can lead to issues such as flickering, uneven dimming, or reduced bulb lifespan.
Traditional dimmer switches were originally designed for incandescent and halogen bulbs, which operate differently from LEDs. Incandescent bulbs use a resistive load, whereas LEDs are electronic and require a different type of dimming control. If you use a standard dimmer switch with dimmable LEDs, you might experience problems because the switch is not calibrated to handle the lower wattage and electronic nature of LEDs.
To ensure optimal performance, look for dimmer switches specifically designed for LED lights. These switches are engineered to manage the low wattage and electronic dimming requirements of LEDs, providing a more stable and reliable dimming experience. LED-compatible dimmers often feature a wider range of adjustment settings and are better at handling the nuances of LED technology, such as maintaining consistent light levels without flickering.

Install a Dimmer Switch
Benefits of a Dimmer Switch
The installation of a dimmer switch provides remarkable benefits by enhancing control over the brightness of your LED lights. One of the primary advantages is the ability to adjust the lighting intensity to suit various needs and preferences. For instance, you can easily transition from bright, focused lighting that is ideal for tasks such as reading or cooking to a softer, more ambient glow that is perfect for creating a relaxing atmosphere during evening gatherings or intimate dinners. This flexibility is invaluable in both residential and commercial settings, allowing users to tailor the lighting to match different activities and moods.
In addition to setting the desired ambiance, dimmer switches contribute to reducing eye strain. When working or studying, overly bright lighting can cause discomfort and fatigue. By lowering the light intensity, you create a more comfortable environment that minimizes glare and makes it easier to focus on tasks for extended periods. Furthermore, dimming your lights can lead to energy efficiency and cost savings. Lowering the brightness reduces power consumption, which can decrease your energy bills over time. Additionally, operating LED bulbs at a lower brightness level can help extend their lifespan, as the components experience less wear and tear compared to running at full brightness continuously.
Choosing and Installing a Dimmer Switch
Selecting the appropriate dimmer switch and ensuring its correct installation are crucial steps in achieving optimal performance. When choosing a dimmer switch, it is essential to ensure compatibility with LED technology. Traditional dimmer switches designed for incandescent or halogen bulbs may not function properly with LEDs, potentially leading to issues such as flickering or inconsistent dimming. Therefore, it is important to select a dimmer switch explicitly labeled as LED-compatible. These switches are engineered to handle the specific requirements of LED lighting, providing smoother and more reliable operation.
Another important consideration is the wattage and voltage rating of the dimmer switch. Dimmer switches come with various wattage capacities and voltage specifications. It is necessary to match these ratings with the total wattage of the LED bulbs you intend to use. For instance, if you have multiple LED bulbs on the same circuit, ensure that the combined wattage does not exceed the maximum rating of the dimmer switch. This ensures that the dimmer can handle the load without issues.
The type of dimmer switch is also a factor to consider. Dimmer switches are available in different styles, including rotary, slide, and digital models. Rotary dimmers involve turning a knob to adjust brightness, while slide dimmers use a lever or slider for more precise control. Digital dimmers offer advanced features such as programmable settings and remote operation. Selecting a type that suits your preferences and complements your existing decor is important for both functionality and aesthetics.
The installation process for a dimmer switch involves several key steps. Begin by turning off the power to the circuit at the breaker box to ensure safety. Use a voltage tester to confirm that the power is off before proceeding. Remove the cover plate of the existing switch and take out the switch from the electrical box. It is helpful to note the wiring configuration or take a picture for reference. Connect the wires from the dimmer switch to the corresponding wires in the electrical box, typically involving the hot (live) wire, neutral wire, and ground wire. Secure the connections with wire nuts and ensure they are properly aligned.
Once the wiring is complete, carefully tuck the wires back into the electrical box and secure the dimmer switch with screws. Attach the cover plate and ensure it is properly aligned. Restore power at the breaker box and test the dimmer switch to verify that it operates correctly. Adjust the brightness to confirm that the dimming function works smoothly without flickering. If you are unsure about any part of the installation process or encounter difficulties, consulting a professional electrician is a prudent option. A professional can ensure that the dimmer switch is installed correctly and safely, providing peace of mind and optimal performance.
Use LED Lampshades or Covers
Effectiveness of Lampshades
Lampshades or covers are a practical and aesthetically pleasing way to manage the brightness of LED lights in your space. By diffusing the light emitted from the bulb, lampshades scatter the illumination, resulting in a softer, more even light distribution. This diffusion helps to reduce the harshness of direct light, creating a more comfortable and visually appealing environment. The softened light can enhance the ambiance of a room, making it more inviting and relaxing, especially in settings like living rooms, bedrooms, and dining areas.
Lampshades come in various styles and materials, each offering different levels of light diffusion. For example, fabric lampshades, such as those made from linen or silk, provide a warm, diffused light that can soften the overall brightness while adding a decorative touch. Frosted glass covers and acrylic diffusers offer a more modern look, creating a gentle, even illumination that reduces glare and minimizes the intensity of the light. By choosing the right lampshade, you can effectively balance brightness with aesthetic appeal, making your lighting both functional and stylish.
Selecting the Right Lampshade
Choosing the right lampshade or cover involves considering both the material’s properties and the design’s effectiveness in light diffusion. The material of the lampshade plays a crucial role in how well it diffuses light. Fabric shades, for example, are known for their ability to soften and diffuse light effectively. The weave and thickness of the fabric can influence the amount of light that is allowed to pass through, with denser fabrics providing more diffusion.
Frosted glass covers are another popular choice. These covers are designed to scatter light, reducing glare and creating a soft, even illumination. The frosted finish helps to diffuse the light more uniformly compared to clear glass, making it a suitable option for both functional and decorative purposes.
Acrylic diffusers are another effective option, often used in contemporary lighting designs. Acrylic is lightweight and durable, and its frosted or textured surface can distribute light evenly, reducing brightness and preventing harsh shadows. Acrylic diffusers can be particularly useful in areas where you need a modern look combined with effective light control.
When selecting a lampshade or cover, consider how it will fit with your existing decor. The design of the lampshade should complement the style of your room, enhancing the overall aesthetic while achieving the desired light intensity. For instance, a fabric shade with a decorative pattern can add visual interest to a room, while a sleek, frosted glass cover might suit a minimalist interior.
Additionally, the size and shape of the lampshade can impact its effectiveness in reducing brightness. Larger shades tend to diffuse light more effectively than smaller ones, and certain shapes, such as those with a wider base, can spread light more evenly across the room. Ensure that the lampshade you choose is appropriately sized for the lamp base and the room to achieve optimal light diffusion.
Adjust the Light Fixture
Changing Fixture Position
The placement and orientation of a light fixture can dramatically impact the perceived brightness and quality of illumination in a room. By repositioning the fixture, you can effectively manage how the light is distributed and perceived. One key approach is to direct the light away from direct line-of-sight, which helps in reducing glare and the harshness of the light. For instance, placing a light fixture at an angle or directing it towards a wall or ceiling can create a more diffuse and pleasant lighting effect. This technique is especially useful in areas where direct, intense light could cause discomfort, such as in workspaces, living rooms, or bedrooms.
Another important consideration is the use of fixtures with built-in diffusers. These diffusers, which can be made from materials like frosted glass or acrylic, help to scatter light more evenly. By doing so, they reduce the harshness and glare often associated with direct lighting. Fixtures designed with diffusers or softening lenses provide a more uniform light distribution, which can make the room feel more comfortable and inviting. For example, a ceiling-mounted fixture with a frosted cover will soften the light and reduce harsh shadows compared to a bare bulb, creating a more pleasant and balanced illumination.
Additionally, the height and angle at which the fixture is mounted play a significant role in light distribution. Lowering the fixture or angling it downward can create a softer, more intimate lighting effect, while higher-mounted fixtures tend to produce more intense, direct light. Adjusting these factors based on the specific needs of the room can help achieve the desired lighting atmosphere, whether you aim for a bright, focused light or a softer, ambient glow.
Using Reflectors and Baffles
Incorporating reflectors and baffles into your light fixture is another effective method for controlling brightness and light distribution. Reflectors are designed to redirect and spread light, helping to create a more even illumination across a space. They can reduce harsh spots and glare by bouncing light off surfaces, which results in a softer, more diffuse lighting effect. Reflectors come in various designs and materials, such as metal or plastic, and their effectiveness depends on their shape and placement.
For instance, a reflector with a wide, shallow design can disperse light over a larger area, which helps to minimize the intensity of light in specific spots. Conversely, a more focused reflector can direct light towards particular areas, making it ideal for tasks that require concentrated illumination while reducing overall room brightness. Selecting the right type of reflector based on your lighting needs and the design of the fixture can significantly enhance the comfort and functionality of your lighting setup.
Baffles, on the other hand, are used to absorb and diffuse light, reducing glare and softening the overall lighting effect. Typically installed within the light fixture, baffles can be made from materials such as fabric or textured plastic. They help to control the direction and spread of light, making them useful for creating a balanced and less intense lighting environment. By adjusting the angle and positioning of baffles, you can fine-tune the lighting effect to achieve a more subdued and comfortable illumination.
Experimenting with different configurations of reflectors and baffles can help you find the optimal setup for your space. For example, angling a reflector upwards can create a soft, ambient light that fills the room more evenly, while positioning a baffle closer to the light source can reduce glare and create a more focused illumination. By carefully adjusting these elements, you can customize the lighting to better suit your preferences and enhance the overall ambiance of your space.
Harness the Power of LED Light Filters
Understanding the Function of LED Light Filters
LED light filters are essential tools designed to manage and modify the intensity of light emitted by LED bulbs. These filters come in various types, including colored gels, diffusers, and frosted panels, each serving a unique purpose. The primary function of these filters is to reduce the brightness of LED lights while simultaneously enhancing or altering the light’s color and quality. By adjusting the light’s intensity and tone, these filters help create a more balanced and comfortable illumination environment.
Colored filters, for example, can shift the hue of the light, making it warmer or cooler depending on the desired effect. This can be particularly useful in settings where mood lighting is important, such as in restaurants, theaters, or home spaces. Diffusers and frosted filters scatter the light, softening the harshness and reducing glare. This results in a more even distribution of light that can enhance the overall ambiance of a room.
In addition to their functional benefits, LED light filters also add a decorative element to lighting setups. They come in various designs and colors, allowing you to customize the look of your space while managing light intensity. Whether you want to create a dramatic effect with a vibrant color filter or achieve a subtle, warm glow with a frosted filter, these accessories offer flexibility in achieving your lighting goals.
How to Apply LED Light Filters
Applying an LED light filter is a straightforward process, but it is important to ensure compatibility and proper installation to achieve the best results. Begin by selecting a filter that matches the specifications of your LED bulb and fixture. Filters are available in different sizes and shapes to accommodate various lighting setups, so choosing one that fits well is crucial.
To attach the filter, position it over the light source or the fixture, depending on the design of the filter and the type of lighting you have. Many filters come with adhesive backing or clips that make them easy to secure in place. Ensure that the filter does not obstruct the airflow or cooling of the LED bulb, as proper ventilation is necessary for the efficient operation and longevity of the light source.
If the filter is designed to be placed directly on the bulb, ensure that it does not interfere with the bulb’s heat dissipation. Overheating can reduce the lifespan of the LED and affect its performance. For filters that attach to the fixture, make sure they are securely mounted and do not create any safety hazards.
Filters can be particularly useful in various applications, such as creating specific lighting effects or reducing the harshness of direct light. For instance, if you want to soften the light in a room where harsh LED bulbs are causing discomfort, a frosted filter can help by diffusing the light more evenly. Colored filters can be used to add a creative touch or to match the lighting to the theme of an event or space.
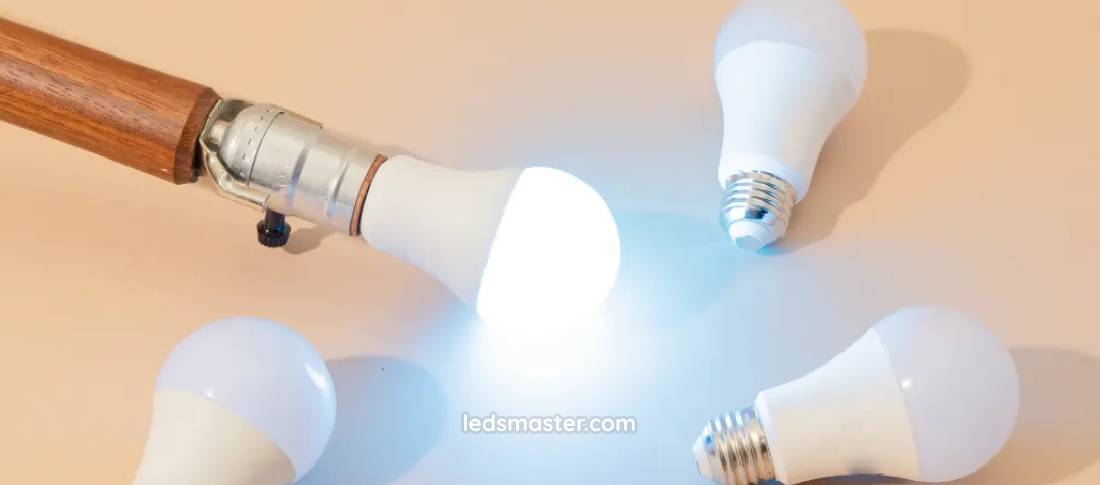
Choose Lower Wattage LED Bulbs
The Impact of Wattage on Brightness
The wattage of an LED bulb is a key factor influencing its brightness. In LED lighting, wattage primarily refers to the amount of power the bulb consumes rather than its light output. However, lower wattage LED bulbs generally emit less light compared to higher wattage ones. This makes lower wattage bulbs an excellent choice for areas where you prefer a softer, more subdued illumination.
By opting for bulbs with lower wattage, you can achieve a reduction in brightness while maintaining energy efficiency. LED technology is known for its ability to provide significant light output with minimal energy consumption, so selecting a lower wattage bulb will still ensure energy savings compared to traditional incandescent or halogen bulbs. This approach allows you to customize the lighting in your space according to your preferences and needs without sacrificing the benefits of energy-efficient lighting.
Finding the Right Wattage
When choosing lower wattage LED bulbs, it is crucial to also consider the lumen output of the bulb. While wattage indicates the energy consumption of the bulb, lumens measure the actual light output. Therefore, selecting the right bulb involves balancing both wattage and lumens to achieve the desired level of brightness.
For a softer lighting effect, opt for LED bulbs with lower lumen output. Lumen ratings provide a more accurate representation of how much light the bulb emits. For example, a 5-watt LED bulb might produce around 400 lumens, while a 10-watt LED bulb might produce about 800 lumens. If your goal is to create a gentle illumination, look for bulbs with lower lumen ratings within the lower wattage range.
Additionally, ensure that the wattage of the bulb you select is compatible with your lighting fixture and meets your specific lighting needs. Fixtures often have maximum wattage ratings, so it is important to choose bulbs that do not exceed these limits to avoid potential issues with overheating or damage.
To find the appropriate wattage and lumen combination, consider the intended use of the lighting. For instance, in areas where ambient light is required, such as living rooms or bedrooms, a lower wattage and lumen bulb may be ideal. Conversely, for task lighting or areas requiring more illumination, slightly higher wattage and lumen bulbs might be necessary.
Adjust the Color Temperature
Color Temperature
Color temperature, expressed in Kelvins (K), is a critical factor in determining the appearance of light emitted by LED bulbs. It plays a significant role in how light affects the ambiance and perception of a space. Lower color temperatures, such as 2700K, produce a warmer, more inviting light similar to traditional incandescent bulbs. This type of light creates a soft, cozy atmosphere, making it ideal for areas where a relaxed and comfortable environment is desired, such as living rooms or bedrooms.
On the other hand, higher color temperatures, like 5000K, produce a cooler, more intense light akin to daylight. This cooler light is often associated with increased brightness and clarity, making it suitable for work environments or spaces that require more focused illumination. However, this cooler light can sometimes feel harsh or too intense in settings where a softer ambiance is preferred.
By adjusting the color temperature of your LED lighting, you can significantly influence the overall feel and effectiveness of the lighting in a space. For example, using a lower color temperature can reduce the perception of brightness and create a more relaxed and soothing atmosphere. This adjustment can help in minimizing glare and making the light feel less harsh, which is especially beneficial for settings where comfort is a priority.
Choosing and Switching LED Bulbs
To achieve the desired lighting effect through color temperature, selecting the right LED bulbs is essential. Many LED bulbs come in a range of color temperatures, allowing you to choose one that aligns with your preferences and the specific needs of your space. If you prefer a softer and less bright illumination, opt for LED bulbs with a lower color temperature, such as 2700K to 3000K. These bulbs provide a warm, gentle light that can enhance the comfort of your environment while reducing glare.
When switching LED bulbs, it is important to consider how the color temperature will complement the overall ambiance of the room. For example, in a dining area or living room where a cozy and inviting atmosphere is desired, a lower color temperature bulb will be more appropriate. Conversely, for areas such as home offices or kitchens where task lighting and clarity are essential, a higher color temperature bulb might be more suitable.
Ensure that the color temperature of the new LED bulbs matches the existing lighting fixtures and design elements of the space. LED bulbs are available in various color temperatures, so selecting the right one involves assessing the current lighting setup and the effect you want to achieve.
Implement Light Blocking Techniques
Light Blocking Curtains
Light blocking curtains or shades are highly effective solutions for managing the intensity of light entering a room. These specialized window treatments are designed to significantly reduce the amount of light that passes through, providing greater control over the illumination within your space. By installing light blocking curtains, you can create a more comfortable and visually pleasing environment, especially in areas where natural light might be excessively bright or harsh.
These curtains are made from dense, opaque fabrics that are engineered to block out light completely or to varying degrees, depending on your needs. They are particularly beneficial in rooms with large windows or skylights, where the influx of natural light can sometimes be overwhelming. For example, bedrooms with morning sunlight or living rooms exposed to midday glare can benefit from light blocking curtains that offer a more controlled and subdued lighting effect.
In addition to their functional benefits, light blocking curtains also contribute to the aesthetic of a room. Available in a variety of colors, patterns, and styles, they can complement your decor while managing light levels. When choosing light blocking curtains, consider the thickness of the fabric and the quality of the lining. Heavier, multi-layered fabrics typically offer better light blocking capabilities compared to lighter materials.
Proper installation is key to maximizing the effectiveness of light blocking curtains. Ensure that the curtains are wide enough to cover the entire window or door frame and that they extend beyond the edges to prevent light leakage. For optimal results, install the curtains on a rod that allows them to hang close to the glass surface, reducing gaps through which light might seep.
Adding Window Films
Window films provide an alternative method for controlling light levels by filtering or reflecting sunlight. These films are thin, adhesive layers applied directly to glass surfaces, such as windows or skylights. They work by reducing glare and brightness while allowing some natural light to continue flowing into the room, thereby creating a more comfortable lighting environment.
There are various types of window films designed to address different lighting needs. For instance, tinted window films can reduce the intensity of sunlight and UV rays, helping to prevent the fading of interior furnishings and reducing heat build-up. Reflective films, on the other hand, are designed to reflect sunlight away from the glass surface, significantly cutting down on glare and bright spots. Clear or frosted films offer a more subtle reduction in light, providing privacy while still allowing ample daylight to enter the room.
When choosing window films, consider the level of light reduction you require. Films are available in different shades and opacities, so select one that meets your specific needs. For example, if you need to drastically cut down on brightness in a sun-drenched room, a darker, more reflective film may be appropriate. For areas where you want to maintain a balance between light and privacy, a lighter, frosted film might be more suitable.
Applying window films requires careful preparation and installation. Start by cleaning the glass surface thoroughly to ensure proper adhesion of the film. Cut the film to the appropriate size, and apply it to the glass using a squeegee to smooth out air bubbles and ensure a secure fit. Many window films come with detailed instructions or professional installation options to ensure optimal performance.
Employ Task Lighting Solutions
Using Task Lighting
Task lighting is a strategic lighting solution designed to illuminate specific areas where focused light is needed, without affecting the overall ambient lighting of a room. Unlike general or ambient lighting, which provides broad illumination for an entire space, task lighting is targeted to enhance visibility and reduce strain for particular activities. This makes it an ideal solution for areas where precise lighting is essential, such as reading nooks, workspaces, or cooking areas.
By employing task lighting, you can create well-lit zones that cater to specific needs while maintaining a softer, less intense ambient light throughout the rest of the room. This approach helps balance brightness levels and can make a space more functional and comfortable. For example, in a home office, task lighting can be used to brighten the desk area, making it easier to read and work without overwhelming the entire room with bright lights. Similarly, in a kitchen, under-cabinet lights can illuminate countertops for food preparation, reducing shadows and enhancing visibility.
Selecting Adjustable Task Lights
When selecting task lighting, you should choose fixtures that offer both adjustable brightness levels and directional control. This versatility enables you to tailor the light to specific tasks without over-illuminating the entire space. Fixtures with adjustable brightness let you modulate the light intensity according to the task at hand, whether you need bright, focused light for detailed work or a softer glow for more relaxed activities. Directional control further enhances this flexibility by allowing you to direct the light precisely where it is needed. This helps to eliminate shadows and reduce glare, making your workspace or reading area more comfortable and functional.
Popular examples of adjustable task lighting solutions include desk lamps, floor lamps, and under-cabinet lights. Desk lamps often feature adjustable arms and heads, enabling you to position the light exactly where you need it, while floor lamps with flexible necks or adjustable shades provide similar benefits for larger areas. Under-cabinet lights, commonly used in kitchens and workspaces, can be aimed at specific surfaces to ensure thorough illumination. By incorporating these types of adjustable fixtures, you can create a lighting environment that enhances visibility and productivity, while maintaining a balanced and comfortable level of ambient light in the room.
Implement Smart Lighting Systems
Advantages of Smart Lighting
Smart lighting systems bring a new level of control and flexibility to how you manage lighting in your home or workspace. One of the primary advantages is the ability to adjust brightness and color temperature through intuitive apps or voice commands. This means you can customize the lighting in your space to suit various activities or times of day with just a few taps on your smartphone or a simple voice command. For example, you can program your lights to gradually dim as you wind down in the evening or brighten as you start your day, all without manually adjusting individual fixtures. Additionally, smart lighting systems often include features like automation and scheduling, allowing you to set lights to turn on or off at specific times or in response to certain triggers, such as occupancy sensors detecting movement in a room. This level of control not only enhances convenience but also contributes to energy efficiency by reducing unnecessary lighting when rooms are unoccupied.
Setting Up Smart Lighting
Implementing a smart lighting system typically involves two main steps: installing smart LED bulbs or integrating smart controls with your existing fixtures. Smart LED bulbs can replace standard bulbs in your current fixtures and are available in various styles, including dimmable options and those with adjustable color temperatures. Once installed, these bulbs connect to your home’s Wi-Fi network, allowing you to control them through a dedicated app or compatible voice assistants like Amazon Alexa or Google Assistant. Alternatively, if you prefer to retain your existing fixtures, you can integrate smart lighting controls such as dimmer switches or smart plugs that offer similar functionalities. The setup process usually involves connecting the smart devices to your home network, configuring them through the app or control panel, and setting your preferred lighting schedules and scenes. By leveraging these smart technologies, you gain the ability to effortlessly manage light intensity and create a personalized lighting environment that adapts to your needs and preferences, all while enhancing overall convenience and efficiency in your space.
Conclusion
Adjusting the brightness of LED lights can significantly enhance comfort and functionality in various environments. By utilizing dimmable LEDs, selecting the right dimmer switches, installing lampshades, repositioning fixtures, using reflectors and baffles, applying light filters, choosing lower wattage bulbs, and adjusting color temperatures, you can tailor the lighting to meet your needs. These methods not only help in creating the perfect ambiance but also contribute to energy efficiency and extend the lifespan of your LED lights. With these strategies, you can ensure that your lighting is both effective and adaptable, enriching your living or working spaces.